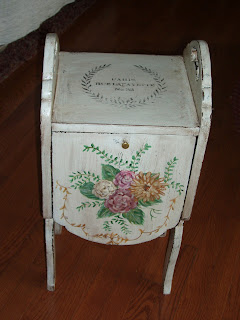
The key to good day in my workshop is having a well stocked store room full of things just waiting to become something lovely. My last adventure in the design room proved to be such a delight I could hardly contain my joy, not only did I put together several projects but I also finally learned how to do image transfers with Citra Solv. My first attempts were not successful and it took me over a week of experimenting and watching You Tube videos to get the hang of it. It was well worth it and I am sure that with more practice mastering this process it will become a real asset.
This is what I started with, I had this little table I bought as GW and an old drawer and door that I knew would be a real nice combination. I put the drawer on top of the table attached it with a little Gorilla Glue and screws. Then I set the door panel onto the top of the box and put a set of hinges on the back to make it like a treasure chest on legs. I painted it with an undercoat of black brown and let it set out in the sun to dry. After the glue and undercoating dried I gave it a coat of olde white. I found a great design on "http://upcyclingmylife.blogspot.com/2011/07/little-nova-scotia-rocking-chair.html . Deborah is such a talent woman and I hope you check out her wonderful blog it is awesome! Thank you for the free graphic I love it and hope to use it again! I printed it out in the reverse image mode on a laser printer so I could transfer it to my treasure chest table.

After several attempts I finally got the image to transfer using the Citra Solve method. I painted some poly coat onto the side with image so it would not smear when I went to apply the glaze. The glaze is a dark brown with just a hint of black in it.
I really like the way the image transfer worked out, I almost gave up on using it but with a little hard work and a prayer it all worked out just like I imagined it would.


