Saturday, July 14, 2012

D-R-E-A-M


I had this wonderful old window frame with raggedy screen and decided this would be the week to doll it up.  I made the dream banner out of a grocery bag, some stencils, and paint.  Then I hot glued them to a piece of twine.  Lucky me the 2 knob were already there, probably used for taking the screen out of the window at the end of the season.  For you young ones there was a day when the window screens were taken out at the end of summer and re-installed in the spring. Can you imagine?  They had to be painted every so often and then stored.  This little cutie has seen a lot of use and I am furthering her life by making her into art. I attached the vintage wire basket with some metal strap and screws and put screw eyes in each side to hold wire so I could hang the old pictures from it.  I love this piece and don't want to sell it but I do this for income so good bye little wonderful window you will be in my dreams for ever! LOL too much? naw


Dry Sink

Went to a garage sale and bought this neat dry sink for 10 bucks, wow haven't spend over 2.00 in a long time and I have to say it felt good! Sorry as I said in my last post I was so excited to get back to painting that I forgot "before" pictures.  It just had a golden oak stained finish so nothing too radical about this make-over.  I had to make some new doors for this piece but other than that it was in good shape.  I painted it with bonding primer first and then a coat of off white.  I sanded the edges and gave it a coat of poly finish.  I can imagine this as a wonderful display piece filled with prim or shabby chic goods.

ABC Table

It is so good to be back to work. I took some time off because my youngest son graduated this year from High School and of course then comes the open house. It went well and we had a lot of fun seeing family and friends.  Jeffrey as I said is my youngest at the trail end of a total of seven children (6 boys and 1 girl-miracles happen).  It was a major event to see him cross the finish line and graduate, not only for him but for me too. Happy Day all around.

It has been so hot I have had a really hard time working. Temperatures have hit 100 several times and today it is well over 90. Thank the Good Lord Monday I was able to get back to business. I started with a wonderful little children's table and chair set that I had squirreled away in my store room.  I don't have a "before" picture on my work for this week I was so excited to actually handle a paint brush I didn't even give it a thought until I was almost done painting, sorry but at least I am sharing the idea for the design! Yeah!


I knew that I wanted them to be painted blue but that was all I had in mind. It wasn't until the next day that I thought they would look nice with birds, letters, and numbers.  I am pleased with the outcome and think they look so much better this way than the plain old stain that they use to have.

Sunday, June 24, 2012

Reclaimed Mannequin

I went to the flea market on Memorial Day and found this great mannequin form for 2.00.  It was cracked in several places but I love mannequins and just had to have it. I knew immediately what I was going to do with it. My mind never stops when I am at a flea market the problem is the rest of me can't keep up ( that is why it took a month to get to this project).  I patched up the cracks with some plaster wrap and went on to the next step.

I took an old door panel I had and primed it and then painted it dove grey.

Next I covered the entire mannequin in plaster wrap.
Activa Rigid Wrap Plaster Cloth, 5-Pound
This is the stuff that every kid in school makes a mask out of in art class. It is the best stuff ever. I know I could have made my own plaster wrap but with this piece I wanted the wrapping to give it more stability and stick to the plastic mannequin.  Sometime you have to go the distance and pay the man.  I just ordered some more on line from Jo Ann fabrics. They sent me an email for 50% off one item and free shipping...cha-ching! I got the 5 pound box! Can't wait to make the wings I have planned!


I put a board up the back so I would have something I could screw to the door panel


Here is the finished piece. I really like it. After the plaster wrap dried I covered the mannequin in vintage magazine pages. I used some brown paper for the sash and the gold wings are some I just had on hand from another find. I made the roses out of an old quilt and other fabrics.  The star is an old ornament reflector and I used black tulle to make a skirt.  I put some trim around the waist with pre-made roses. (Can you see the purse to the right of the mannequin? I am working on that and will post it later on).

Paris Stool

This is a cool little trunk that I mounted on a study little stool.  I decoupaged some graphics to the top and one the inside where there used to be a mirror. I don't have good luck with glass stuff so I opted to go with graphics instead of replacing the mirror.


End of the Month Projects

Saw this idea on Pinterest and thought it would be fun to make. I found a spoon holder painted it white. Then I sanded the edges to make it look worn and pasted a post card on the top.  The post card came from my clip are file. I happen to have some old hankies to finish it off.


This is just a little crock I picked up and then modge podged a pretty label to.

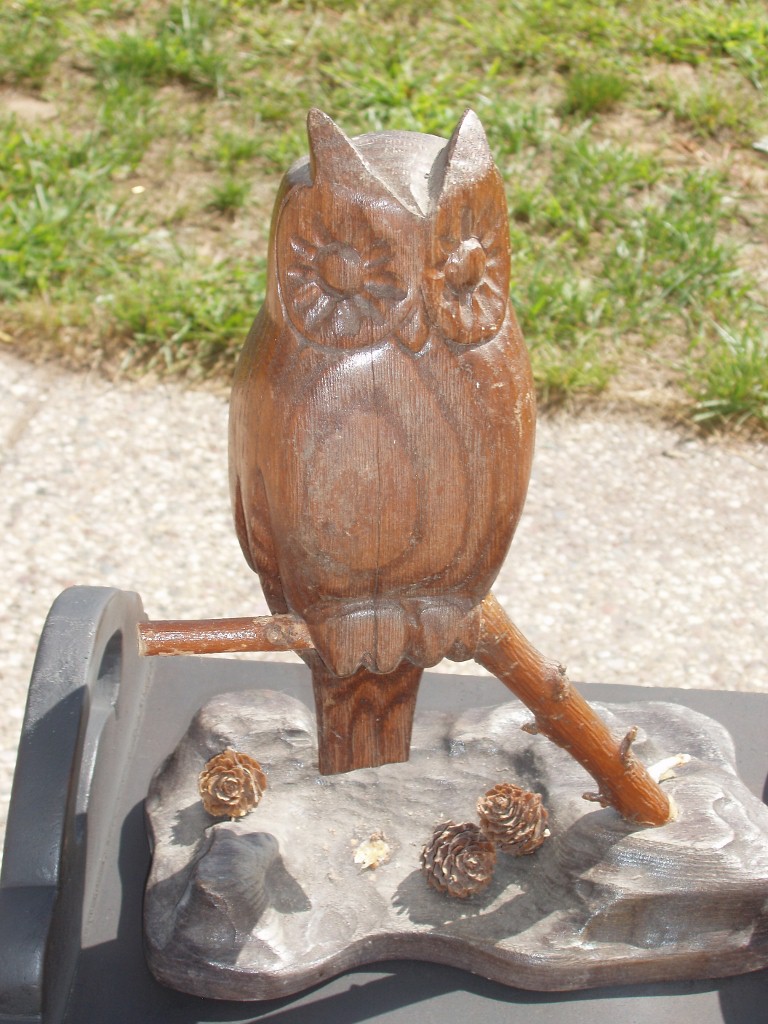
On the left you can se this great looking wooden owl I bought for a buck. It was very dated looking with the pinecones and funny looking base. I painted the owl a metalic silver and then with a wash of black.  I mounted him onto an old bunson burner I picked up at a flea maket. I figured he would be really cool at Halloween he is so ready to keep watch over a fall brew!


This sign is a door panel and a carved fish that I had. I added some netting to set it off. I think it would be super in a man cave!

Subway Art Table Restore

This is a table I got free from a really nice guy. He gave me several things to remake. It was missing the glass top so I pieced the top together using some boards I had in my stock pile.


Subway Art Table Finished.

I painted the main part a dove gray and then just started using the colors I had that I mixed to fill in the top.  I used mainly stencils that I already had and just had a real good time filling in the blanks on this piece.