Thursday, December 8, 2011

Just Some Stuff


These are just some items I worked on this week. I basically repainted, re glued, and remade them to take to the shop and fill my booth with. 


Pink shabby basket with flourish, coffee grinder, and angel picture I placed in an antique frame.

Two containers painted given a shabby paint job, worn angel holy water container in a vintage frame, and old box with bronzed baby shoes I painted shabby white.  The cool letters that spell out the word "love" are from a vintage set I acquired for 5.00!


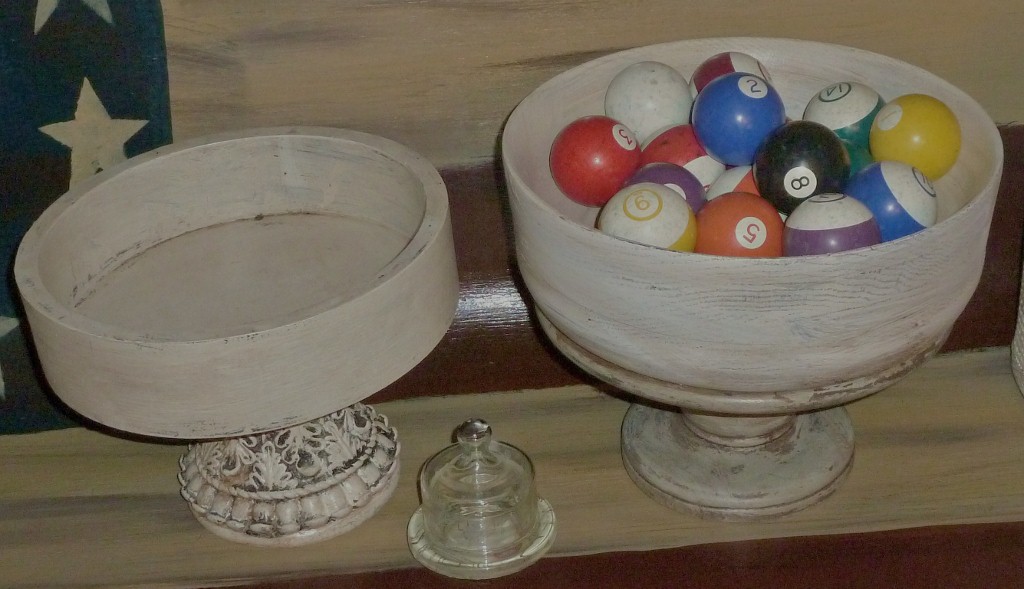
Two wooden bowls I put on stands and painted.  The bowl on the left is filled with old pool table balls.

Large metal spoon and fork I repainted, will look nice on some one's wall!

Nice accent piece I painted shabby white and sliver with a dark umber glaze.


Frame on with metal legs I painted and added some scarp art I made up.  Glass plate with Modge Podge designs of Paris.  Also two mini cloches with vintage looking graphics Modge Podged to the bottom! Love those little guys to pieces!
                                        Old screen door with wooden box for flowers or whatevers!
This old window has rusty wire fencing tacked to it. You could use clothes pins to hang pictures or ephemera. So many possibilities!

                           Over all it was a great week can't wait to see what next week brings!

Side Table Fancy

The popular movement to acquire furniture to repaint and repurpose is huge.  I can say that I have been doing this since the 60's.  I remember an old desk in the basement that no one was using.  I asked my Dad if I could have it and paint it with a can of white paint I found on a shelf in his work shop. Of course he said yes and I set to work filled with anticipation and excitement.  I was shabby chic before shabby chic was cool.  My desk came out really nice except mid way I spilled the can of paint on the basement floor and had to tell my Dad.  I was sure he was going to be angry with me but he wasn't, he helped me clean it up and didn't say a word.  I think he knew I had already suffered enough embarrassment and frustration.  Well not much has changed, I still have the urge to paint stuff and if it is abandoned all the better. My Dad is gone now but he remains in my heart and I have such sweet memories of his wood working projects that he made for me to paint and sell. I used the money to buy things for my children that I couldn't have without the money I made from the stuff he made for me. He was a great guy and I miss him. love you Daddy.

Last week I found this little 2 drawer side table at the thrift store for 4.99 and just had to have it.  It is funny no matter how good or bad you feel when you find a treasure you have the strength of "Zena Princess Warrior" to haul it away to your car!  This little table started out as one side of a vanity. Someone cut it down to make it into a side table and then decided even that wouldn't work for them anymore, yeah guy thanks for donating it and letting me buy it! Once again I got so excited I forgot a proper "before" picture and got one after the priming, next week I promise to do better! I just can't help myself when I get going I am like a tank and cannot stop for anything.


Well here it is finished and ready for market.  I like the combination of the 3 colors together, they make this piece more dimensional.  Well off to plan projects for next week, I have some ideas I hope I have the time to get them all done, I never do. My mind runs like an eight day clock, but I know I give it my best shot.

Little Chair and Stool

Over the last weeks I posted some projects where I used the different methods of transferring images to the top surface of furniture.  One of the projects I used the wax paper method of transferring and I promised to explain this method more this week.  I used it once again on 2 new projects I just finished.  The first thing you do is find a design that fits the project and in my case one that makes me feel all tingly inside.  I found the perfect images on the net and saved them to my computer. The chair I found here http://alapinlife.blogspot.com/2011/10/paris-address-tips-art.html and the stool I found here http://www.yellowbrickhome.com/2011/08/18/be-our-guest-besotted-brand/comment-page-1/#comment-6971. You can always go to my Pinterest boards under Printables and find them and many more cool images.  Once you images are saved to a file and make them the size I need.  I printed the images out on wax paper. To get the paper to feed through my computer I tack it on to a piece of regular piece of computer paper with a dab of white glue, not too much in fact a glue stick would probably work perfectly.   The image is printed in reverse or mirror image so it comes out ready to place fact down on the project.  Before the image is place onto the project it needs to be dampened slightly.  Once it is in place I use the side of a rubber spatula to rub over the back of the paper (Paper is ink side down against the project) using medium force not too much so you don't rip the paper but enough to insure it is transferred to the project.  Don't get discouraged if your first attempt doesn't work or if you it does but the next 2 attempts fail and you end up repainting and trying again.  It is a worth while method that takes practice but the outcome is very nice.  Next week I am trying another method using plastic sheets.  The same type of procedure just a different medium to print the image onto.  The surface of the project should always have a flat paint surface not a gloss or satin for it to transfer without smearing.


Poor old Table


I got free reign over the 5.00 room at the store.  The owner figured I could take the unwanteds that he couldn't even sell for 5.00 repaint them and make money for the both of us. Oh happy day! I love freebies they are the best kind of makeovers!   This poor old table was at the edge of the storage unit and was out in the elements. It was sure to fall apart if I didn't take it home and show it some love! Surely it was my duty as a painter to give this little table a second chance.

I was so excited I forgot to take a before picture until after I primed it, but I am sure you all have seen a similar octagon table they are at every garage sale I have ever gone to.  I usually don't buy them but after all this one was free how was I to resist?  I gave is a good sanding and priming and clean all the cobwebs off from the bottom. It never ceases to amaze me all the spider webs I have to clean off before I can start..........


Next I painted a coat of Brilliant Sliver spray paint by Krylon over the whole piece. I wasn't sure what I was going for at this point so I primed and painted it as a starting point. Usually I have a finished product in mind but this was a project that unfolded as I went along.  After the silver dried I thought the edge would make the table pop if I painted it black.  So after 2 coats of black around the edge I thought hmmmm needs something more and then it came to me a bit of turquoise would be great.  The center seemed too plain so I added a flourish stencil to the middle to give some more character.  I am not a spontaneous person but in this case I think it was okay to just let go and see what happens!

Picture This

I got this ladder the other day for free, that's right free it doesn't get any better than that. I loved the sized it probably went to a set of bunk beds originally.  I had seen a similar version on Pinterest a while back and thought this ladder would be perfect to make a photo ladder.   I primed it and painted it a silky gray color and top coated it with water based poly.  I found the 3 frames brand new at a thrifty store and painted them with some spray paint.  I put some eyelet screw on the top of each frame and tied them with jute to the ladder. I was so lucky that the rungs where close enough together that the bottom of the frame had support, I never even gave it a thought when I bought them to complete this project, one lucky girl!  I will put this in the store for sale so I needed to finish it off with some eye catching graphics. Of course I went to "The Graphics Fairy" and found the key, crown, and bird.  I sized them and printed them out on a sheet of lettered paper I had printed out in advance.  The frames would look nice with pictures of the family in them too so it will be totally up to the new owner to decide.  I love unusual ways to decorate and I think this ladder is nice because it can go anywhere and doesn't have to be attached to a wall.   Thanks for stopping by check back again I will have more upcyled projects for you to look over.