Friday, December 23, 2011

Lace Union Jack

Oh Christmas is almost here.  I am so looking forward to this year my Mom will be here and I am sure we will have so a lot of fun.  I have been so busy planning Christmas I haven't been able to finish too many projects but I did get this trunk done in time to take into the shop this week.  It started out as a really beat up piece that was painted glossy white and in need of much love and attention. I put some legs on it first because I thought it looked to ordinary.

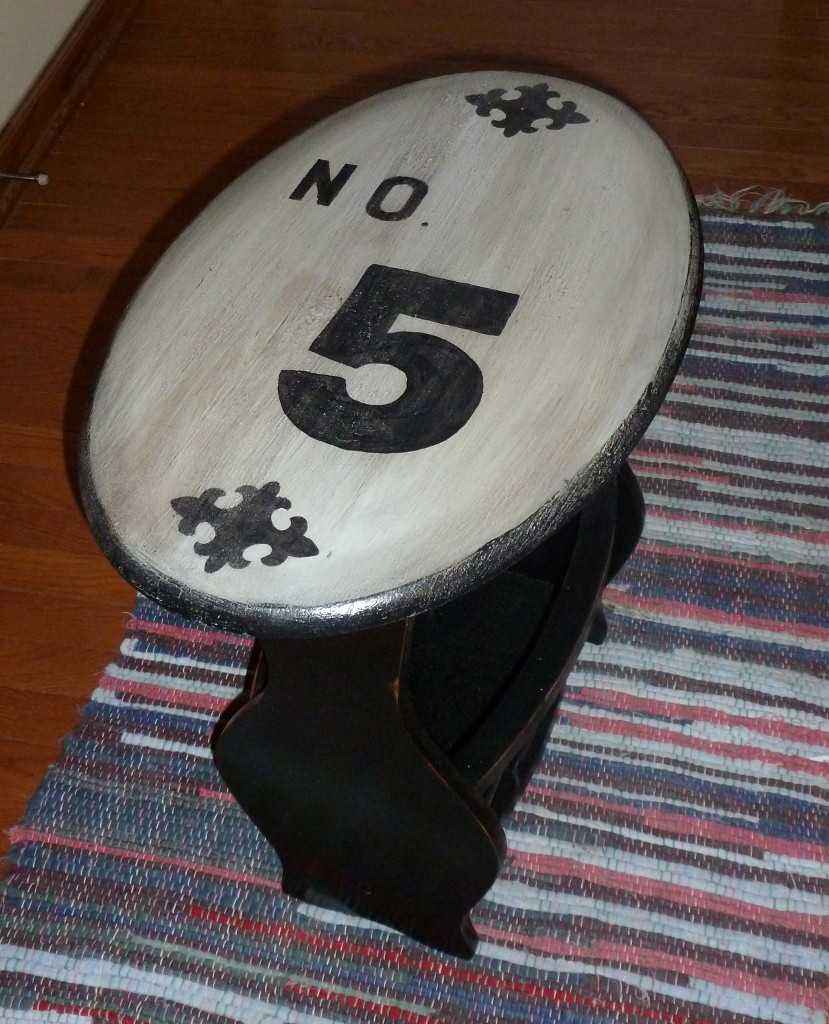
The top actually had a bunny decal on it that took much sanding to remove.  I mixed up my own color a very demure aqua blue.  But first I painted it with a good primer then  a flat white.  I then painted the blue over the white sparingly so that some would show through.  After the blue dried I painted on the crossbars and then made the lace inset.  I placed some lace on the white strips and anchored it down on each side with two boards.  I then sprayed the exposed part with brilliant silver.  After removing the boards and the lace the wonderful lace middle emerges to give it top the look of a Union Jack design.  I coated the whole piece with Min Wax water base poly. I took it to the shop on Wednesday and it will be interesting to see if it sells right away. 


Thursday, December 8, 2011

Just Some Stuff


These are just some items I worked on this week. I basically repainted, re glued, and remade them to take to the shop and fill my booth with. 


Pink shabby basket with flourish, coffee grinder, and angel picture I placed in an antique frame.

Two containers painted given a shabby paint job, worn angel holy water container in a vintage frame, and old box with bronzed baby shoes I painted shabby white.  The cool letters that spell out the word "love" are from a vintage set I acquired for 5.00!


Two wooden bowls I put on stands and painted.  The bowl on the left is filled with old pool table balls.

Large metal spoon and fork I repainted, will look nice on some one's wall!

Nice accent piece I painted shabby white and sliver with a dark umber glaze.


Frame on with metal legs I painted and added some scarp art I made up.  Glass plate with Modge Podge designs of Paris.  Also two mini cloches with vintage looking graphics Modge Podged to the bottom! Love those little guys to pieces!
                                        Old screen door with wooden box for flowers or whatevers!
This old window has rusty wire fencing tacked to it. You could use clothes pins to hang pictures or ephemera. So many possibilities!

                           Over all it was a great week can't wait to see what next week brings!

Side Table Fancy

The popular movement to acquire furniture to repaint and repurpose is huge.  I can say that I have been doing this since the 60's.  I remember an old desk in the basement that no one was using.  I asked my Dad if I could have it and paint it with a can of white paint I found on a shelf in his work shop. Of course he said yes and I set to work filled with anticipation and excitement.  I was shabby chic before shabby chic was cool.  My desk came out really nice except mid way I spilled the can of paint on the basement floor and had to tell my Dad.  I was sure he was going to be angry with me but he wasn't, he helped me clean it up and didn't say a word.  I think he knew I had already suffered enough embarrassment and frustration.  Well not much has changed, I still have the urge to paint stuff and if it is abandoned all the better. My Dad is gone now but he remains in my heart and I have such sweet memories of his wood working projects that he made for me to paint and sell. I used the money to buy things for my children that I couldn't have without the money I made from the stuff he made for me. He was a great guy and I miss him. love you Daddy.

Last week I found this little 2 drawer side table at the thrift store for 4.99 and just had to have it.  It is funny no matter how good or bad you feel when you find a treasure you have the strength of "Zena Princess Warrior" to haul it away to your car!  This little table started out as one side of a vanity. Someone cut it down to make it into a side table and then decided even that wouldn't work for them anymore, yeah guy thanks for donating it and letting me buy it! Once again I got so excited I forgot a proper "before" picture and got one after the priming, next week I promise to do better! I just can't help myself when I get going I am like a tank and cannot stop for anything.


Well here it is finished and ready for market.  I like the combination of the 3 colors together, they make this piece more dimensional.  Well off to plan projects for next week, I have some ideas I hope I have the time to get them all done, I never do. My mind runs like an eight day clock, but I know I give it my best shot.

Little Chair and Stool

Over the last weeks I posted some projects where I used the different methods of transferring images to the top surface of furniture.  One of the projects I used the wax paper method of transferring and I promised to explain this method more this week.  I used it once again on 2 new projects I just finished.  The first thing you do is find a design that fits the project and in my case one that makes me feel all tingly inside.  I found the perfect images on the net and saved them to my computer. The chair I found here http://alapinlife.blogspot.com/2011/10/paris-address-tips-art.html and the stool I found here http://www.yellowbrickhome.com/2011/08/18/be-our-guest-besotted-brand/comment-page-1/#comment-6971. You can always go to my Pinterest boards under Printables and find them and many more cool images.  Once you images are saved to a file and make them the size I need.  I printed the images out on wax paper. To get the paper to feed through my computer I tack it on to a piece of regular piece of computer paper with a dab of white glue, not too much in fact a glue stick would probably work perfectly.   The image is printed in reverse or mirror image so it comes out ready to place fact down on the project.  Before the image is place onto the project it needs to be dampened slightly.  Once it is in place I use the side of a rubber spatula to rub over the back of the paper (Paper is ink side down against the project) using medium force not too much so you don't rip the paper but enough to insure it is transferred to the project.  Don't get discouraged if your first attempt doesn't work or if you it does but the next 2 attempts fail and you end up repainting and trying again.  It is a worth while method that takes practice but the outcome is very nice.  Next week I am trying another method using plastic sheets.  The same type of procedure just a different medium to print the image onto.  The surface of the project should always have a flat paint surface not a gloss or satin for it to transfer without smearing.


Poor old Table


I got free reign over the 5.00 room at the store.  The owner figured I could take the unwanteds that he couldn't even sell for 5.00 repaint them and make money for the both of us. Oh happy day! I love freebies they are the best kind of makeovers!   This poor old table was at the edge of the storage unit and was out in the elements. It was sure to fall apart if I didn't take it home and show it some love! Surely it was my duty as a painter to give this little table a second chance.

I was so excited I forgot to take a before picture until after I primed it, but I am sure you all have seen a similar octagon table they are at every garage sale I have ever gone to.  I usually don't buy them but after all this one was free how was I to resist?  I gave is a good sanding and priming and clean all the cobwebs off from the bottom. It never ceases to amaze me all the spider webs I have to clean off before I can start..........


Next I painted a coat of Brilliant Sliver spray paint by Krylon over the whole piece. I wasn't sure what I was going for at this point so I primed and painted it as a starting point. Usually I have a finished product in mind but this was a project that unfolded as I went along.  After the silver dried I thought the edge would make the table pop if I painted it black.  So after 2 coats of black around the edge I thought hmmmm needs something more and then it came to me a bit of turquoise would be great.  The center seemed too plain so I added a flourish stencil to the middle to give some more character.  I am not a spontaneous person but in this case I think it was okay to just let go and see what happens!

Picture This

I got this ladder the other day for free, that's right free it doesn't get any better than that. I loved the sized it probably went to a set of bunk beds originally.  I had seen a similar version on Pinterest a while back and thought this ladder would be perfect to make a photo ladder.   I primed it and painted it a silky gray color and top coated it with water based poly.  I found the 3 frames brand new at a thrifty store and painted them with some spray paint.  I put some eyelet screw on the top of each frame and tied them with jute to the ladder. I was so lucky that the rungs where close enough together that the bottom of the frame had support, I never even gave it a thought when I bought them to complete this project, one lucky girl!  I will put this in the store for sale so I needed to finish it off with some eye catching graphics. Of course I went to "The Graphics Fairy" and found the key, crown, and bird.  I sized them and printed them out on a sheet of lettered paper I had printed out in advance.  The frames would look nice with pictures of the family in them too so it will be totally up to the new owner to decide.  I love unusual ways to decorate and I think this ladder is nice because it can go anywhere and doesn't have to be attached to a wall.   Thanks for stopping by check back again I will have more upcyled projects for you to look over. 

Thursday, December 1, 2011

Vanity Blues


Just a simple paint job on a fairly plain piece. I bought this for 2.99 at GW Boutique last summer. After I bought it I thought ugh, what was I thinking?  So it sat for a bit until I thought a two tone make over would make this vanity box look acceptable.  When I put the silver knobs back on I was truly delighted that I didn't over look this little vanity.  Being a treasure hunter you must be ready to see past the dirt and imperfections and see the good in the item.  Reminds me of how God overlooks my flaws and loves me in spite of myself.  So overall fun painting and a good reminder of there is always hope.

No. 5


I painted this table once already with a prim country design. Nobody seemed to love it so I took it home and started over.  The oval shape of the table top reminded me of an oval number tag, a - ha I have a plan, just that simple.  I painted the bottom with black spray paint and the top with a flat black.  After the top finished drying I painted on the antique white sparsely so it would appear worn and streaked.  Next I found a number image on Google to get the large size image I needed.  I had stencils for the rest so that was a breeze.  As usual I finished the table top off with a dark glaze.  It will be interesting to see if this little table will sell the second time around!

Baskets Rule

Seems like evey time I go treasure hunting I come home with a basket or a tote.  I just can't resist either of them but I have a new rule if I allow myself to by them I have to get them ready for market within a reasonable amount of time I (less than a month).  I like to store my sewing and knitting in baskets because they can be stacked up and they make nice vintage accents to decorate with so I hate to part with them.  I am in the business to make money so as sad as it seems they have to go. Baskets are functional and beautiful I can picture a stack of them in all colors up to the ceiling (that is my goal!).

I mixed both the antique white and the aqua myself.  I buy a can of paint from the Walmart oops department and then set to adding and mixing until I like the shade and add a bit of plaster of paris that makes it chalky paint.  Well I had these baskets for more than a month and they are going  to the Peddler's Market on Friday so I will officially be in the market for more next time I go perusing for excellent junk.Yeah!

Thinking Pink

 I have have only painted one project in pink a little stool with lace so I thought it was time to try pink again.  I had this child size cupboard sitting in my basement. It was probably made by a Grandpa for his little angel. It was a stained very dark so I had to really work it to transform it to pink.

The insets in the doors are textured plastic and I knew they would pick up a glaze really nice so I set to work. I used some Zinner stain cover first and then applied 2 coats of paint on top of that. I mix my own paint so I went for a demure pink maybe next time I would add a little more white to lighten it not sure.  After I got the cupboard painted I washed it with a dark glaze to antique it. 

I can just picture this cutie full of dishes and tea cups.