Showing posts with label before and after. Show all posts

Sunday, May 31, 2015

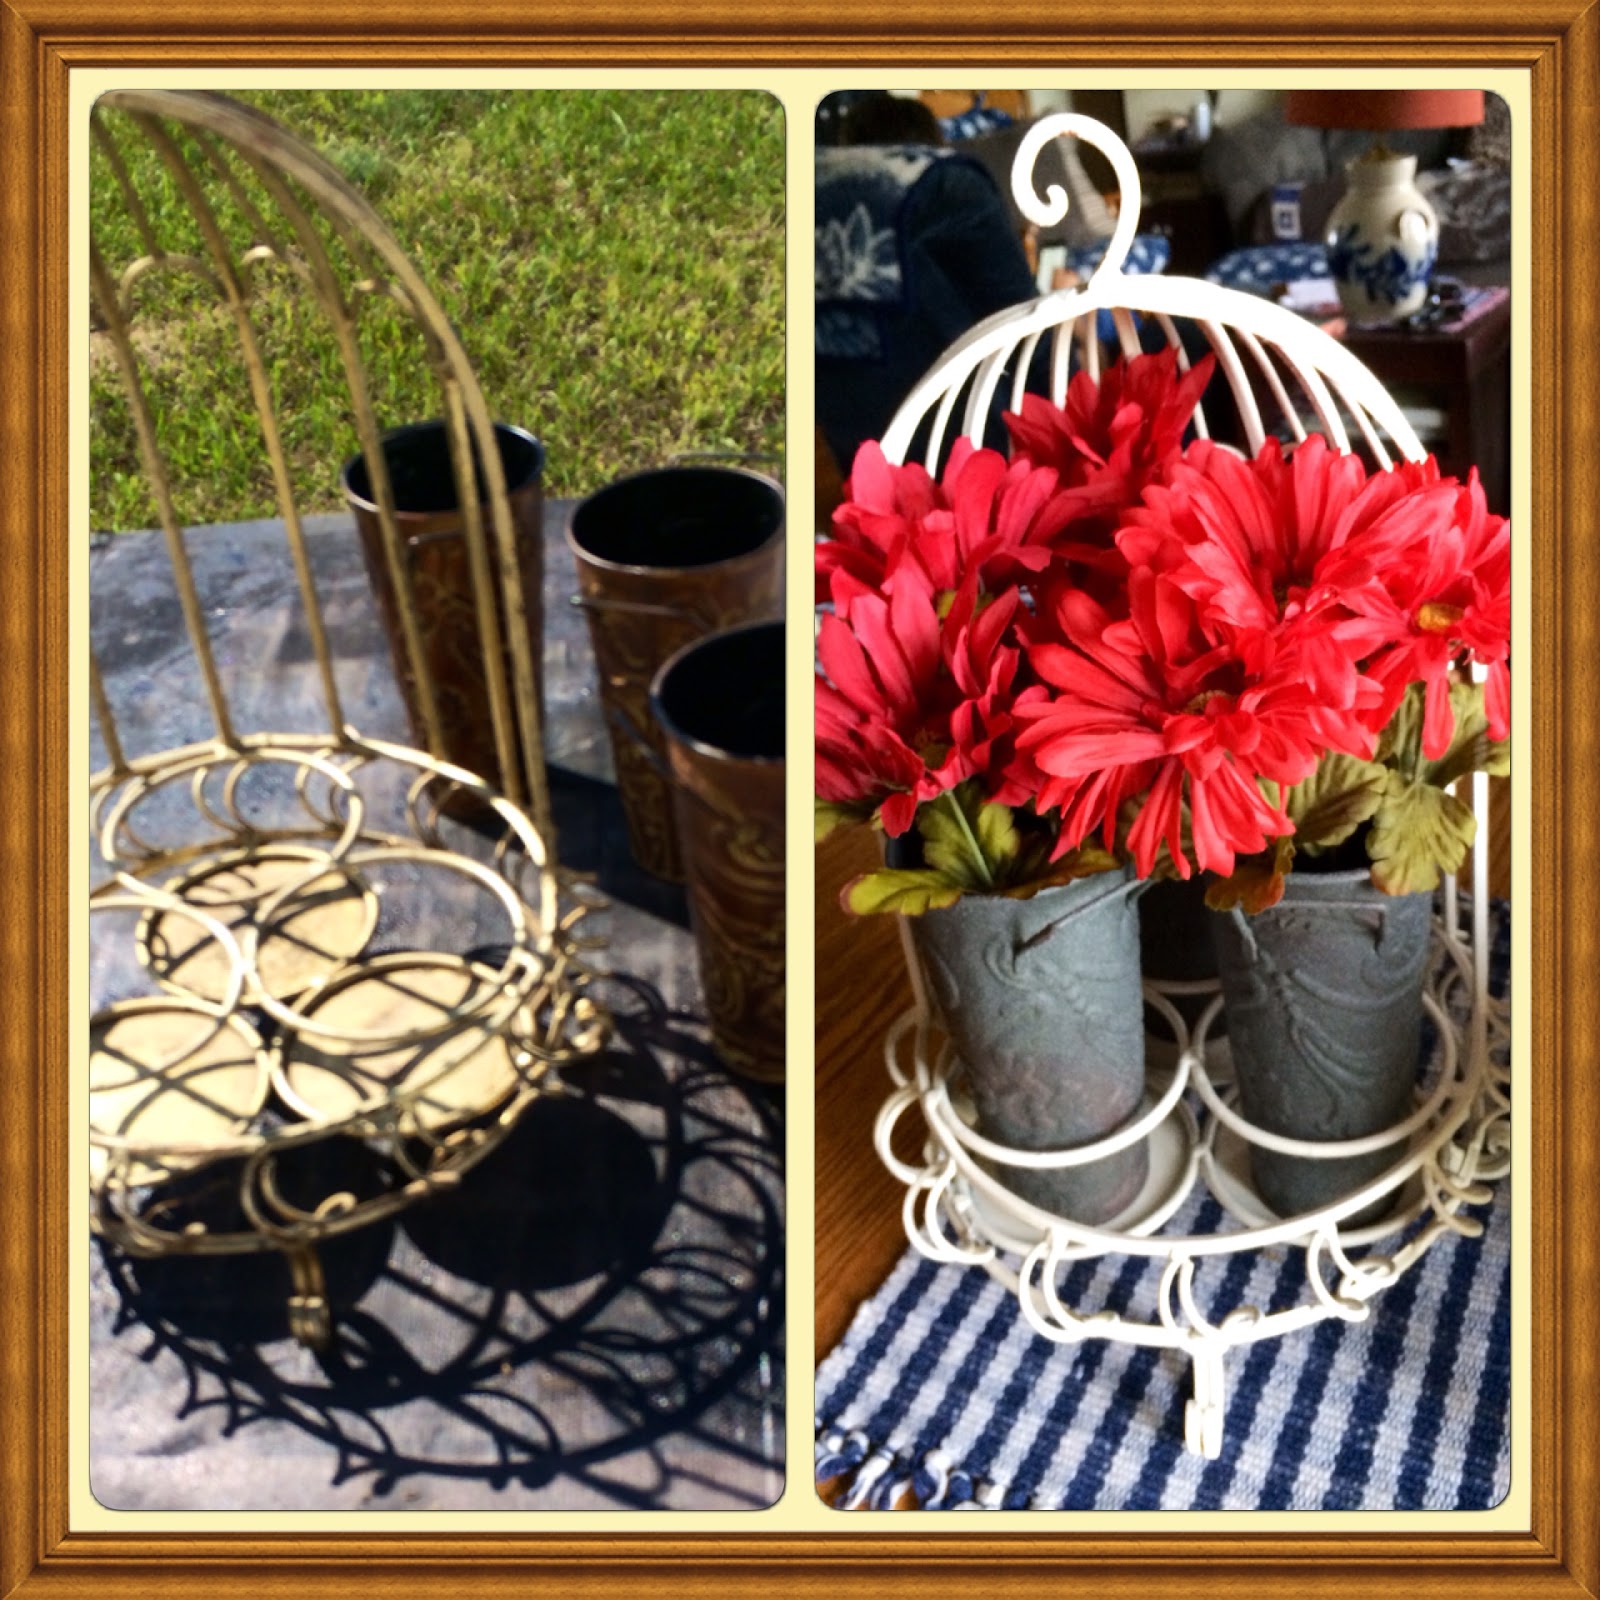
I found this piece at a sale and just loved it. I think it was a wine caddy.

I simply painted it white, I am not much for gold.  Then I went to the Dollar store and found these wonderful tin containers.  I spray painted them a pewter color and added some dark brown glaze to antique them.  I don't remember where I got the flowers at Hobby Lobby. They have really nice flowers you can almost always get on sale.

                                                 Here's a before and an after picture. 
 

Sunday, November 24, 2013

Painted Containers

I found this really cool set of wood boxes at a garage sale last summer.  They were just stained wood with forest green stripes, very uneventful looking I thought. 


So I painted them white and used black to accent them.  I scuffed them up a bit and stained them to complete them with a worn look.


This is a small jewelry size wood dresser that I bought a long time ago at a huge flea market.  It was painted an ugly brown color so I decided to paint it over and stencil some numbers on it.

 This is  a tool box tote I found and painted then stenciled.  I love these totes you can use them for so many different things.  I like to cart my sewing and knitting around in the.


This is an old bean basket that I had for years. I decided to give it a French Country make over.


Wednesday, February 6, 2013

French Post Card Dresser

I bought this two drawer dresser type piece at a garage sale last summer for 2.00.  Even though it is small it weighs a ton.  My poor husband and son had to load it for me.  We just happened to be out walking after a parade and I stumbled upon it just sitting there calling to me.  I even told my husband I would make his favorite dinner if he would load it up for me and even ride in the back seat with it in my Rendezvous.  I had the car packed that day because it was my Mother's birthday and I always try to take a meal and a cake up to her, she is about an hour and half away from me and just had knee surgery so I was the hostess and it takes a lot of stuff to be the hostess where I come from!  So needless to say I had to wedge the dresser in and I was determined to do it and I did!

 I ended up painting it white with two tones of gray.  I wanted to paint a piece with a postcard image on it for so long but every time I would think I about it I would chicken out, I just didn't think I could do it.   Well the day came and I decided to face my fear head on and went over to The Graphics Fairy and found a nice postcard image to use.  I enlarged it by about 200% and traced it on the top of the dresser using newspaper for tracing paper.  I had seen that method used on Pinterest and thought I give it a try since this was such a large design.   It worked well, the only thing I took note of that you need a paper that has a lot on  printing or pictures for it to leave a tracing line.  Other than that the line was adequate and as you can see I was able to hand paint the design fairly well.


             I made up an fictitious address and wrote a small love note that I had translated into French. 

 I added legs to this dresser. I just happened to have a set of unpainted legs in a box waiting to be called to duty.  They mounted very nicely inside the box frame on the bottom I just had to buy some screw and attach them.  I painted the bottom edge and legs with a black stain from MinWax and then sanded them to make them appear worn. I glazed the entire piece to finish it off.

I decided to include this old tote box in this post just because it was sitting on the postcard dresser.  It was just an old box I stained black and I also made the wooden sides to hold the handle which is a lightly painted pink chair spindle.  I love vintage and love taking it and re-purposing it even more!   All in a day's work I faced my fears and came out alright.


Tuesday, February 5, 2013

Union Jack Cupboard


This is the story of a little cupboard I picked up for 4.99.  The before picture is terrible but you get the idea that this little piece was stained and varnished not too impressive.


I thought that this piece was handmade and it was confirmed when I flipped it over and saw the date 1947! So cool.  I encourage you to not be turned off by plywood furniture it paints up very well and you hardly notice that it is plywood as you will see in the photos to follow.


See what I mean stained varnish good-bye new painted finish everyday all day long I love you!  This cupboard would be a great catch all in a breezeway or a good place to stash some cheap paperback novels.  Never underestimate the power of paint!


Old Scale


I had this old rusty worn scale and tried to sell it as it was because I thought it was awesome. But alas no one was interested in it as it was.  My policy is to try to leave things as they are unless no one wants to claim them then I step in and give them a second chance to be loved.

I merely mounted a metal dish to the top of the scale that I painted black so that it would stand out and accent the rusty goodness of the scale. I was perfectly happy with the rust and I thought that the bowl would give it a utilitarian purpose and would be a super decorator piece.


You can see that I found many uses for the rusty old scale and am so pleased that it now has a purpose!

High Chair Remake


I got this high chair a long time ago, I don't think it was very old and but I liked it. It was missing the tray but I thought I could resell it "as is" and someone would be interested in it for display. A nice doll or teddy bear I was thinking but I guess I was the only one that thought that.  The chair sat there for 2 years no nibbles so I decided that I would take it home and give it a make-over.


I decided to go all out and went through my stash of goods to see what I could partner up with this great little chair and give it a chance to be a part of modern decor but keep a trace of the vintage charm.

I attached a found mirror and some shutters to the top and an old door top to the chair handles.  Next I attached some boards so I could give it drawers.  It is a very one of a kind piece and it sold right away.  It makes a nice display piece and doesn't take up much room. 

 I added a tin tile I had to the back as a drawer stop and accent.  I painted the whole thing white and sanded it up so it looked worn.  Who can figure, I put a pile of stuff out in the middle of the room and just start hooking it all together and then sell it. What fun. I am thankful that there are people that see things as I do and expand there minds to decorate with the unusual.

Folk Art Cupboard


Well I am going way back to last year in November to post projects that I finished and never got to put on my blog.  I found three of these old unusual shelves in a free pile (I haven't changed since you last heard from me, free is my favorite along with 2.98)  I liked how whoever made these used boards for the shelves that had holes drilled in them.  The holes are not commercially drilled because they are not uniform and you can see were the drill bit jumped on occasion.  All the better for me I love the things that aren't the norm and have flaws that generate character.


I really didn't know what I wanted to do with the units until one morning I decided they should always be together and never separated.  I got out my trusty saw and leveled on of the shelves so I could mount it on the top of another shelf.  Then I assembled the third shelf to use the boards to create the doors.


In this picture you can see that I bolted one shelf to another, I love to attach things together to make a new inspired piece that never would have been in existence had I not decided to rescue it.

Here is the finished project. I painted it old white and stenciled the doors. I also added top shelf I had lying around to give it a bit more height.  I think that it came out nice, I brought it to the shop to sell and listed it as  a "Folk Art Cupboard" and it sold almost immediately.


Its good to be back posting again and sharing all the things that I love to do.  I hope to post several things today and get caught up.  I do have a board on Pinterest that has all my past projects as well so if you want to see more of what I do jump on over there and take a look!  Blessings, Cat.

Wednesday, November 14, 2012

Chairs


This is an old chair I picked up that someone was throwing away. It needed some TLC which amounted to sanding, gluing, and painting.


I painted it an old white and hand painted the seat and stenciled the chair back.

 I did another set of the Mr. Right and Mrs. Always Right chairs. They make wonderful shower gifts or prop for wedding pictures!

Paris Table and Sewing Chair

Two of the projects I worked on last week were some I rescued from 2 different sales I went to.  The shabby avocado table came from an auction.  It was hand made and needed love. I paid 2.00 for it and was happy as a lark to get it.  I had to scrap all the paint off which I normally don't do I usually use bonding primer. The paint on this desk was peeling and I didn't want to take a chance that it would scab up (ewww ugly word usage) and bite me later so I scrapped and I think I even burned up a few calories in the process which is always a plus for me! lol


 The sweet little chair was purchased at a yard sale for 50 cents.  The seat lifts up to store sewing notions.  It is a darling little size and I passed it up...imagine that me passing on a 50 cent item who can figure. But when I went back to the sale it looked so forlorn just sitting there that I took pity on it and brought it home to make over. Second chances are a blessing.


I think they go together like peas and carrots!